![FlyFreely_Logo_White_OnDark.png]](https://knowledge.flyfreely.io/hs-fs/hubfs/FlyFreely_Logo_White_OnDark.png?height=40&name=FlyFreely_Logo_White_OnDark.png)
This article explains how to set up the Flight Hub 2 integration with FlyFreely.
Pre-requisites:
A paid Flight Hub 2 plan is required. Visit the DJI Flight Hub 2 website and scroll to "Choose Your Plan" to review the available options.
Contact support@flyfreely.io to obtain the information needed to configure your bucket.
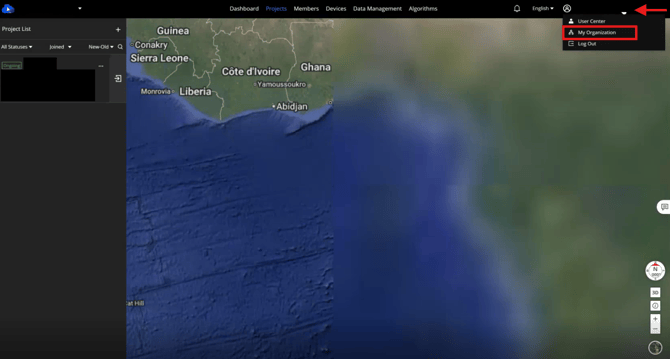
Log into your Flight Hub 2 and click on your username (top right) > My Organization
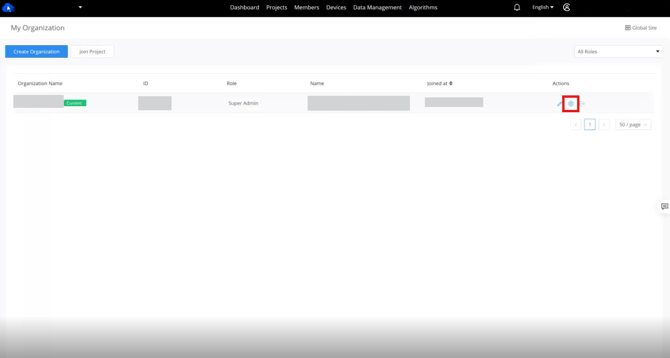
Next to the organisation name under the 'Actions' column, click on settings (cog icon).
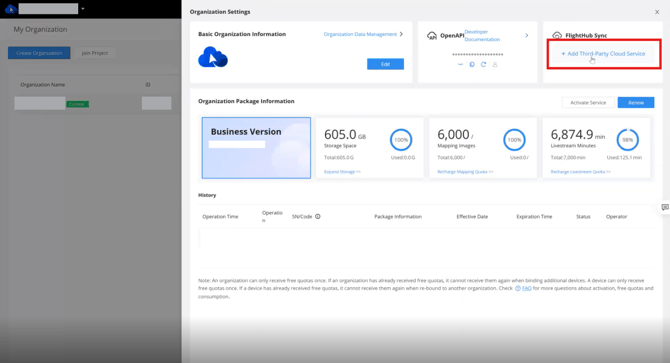
Click on "+Add Third-Party Cloud Service".
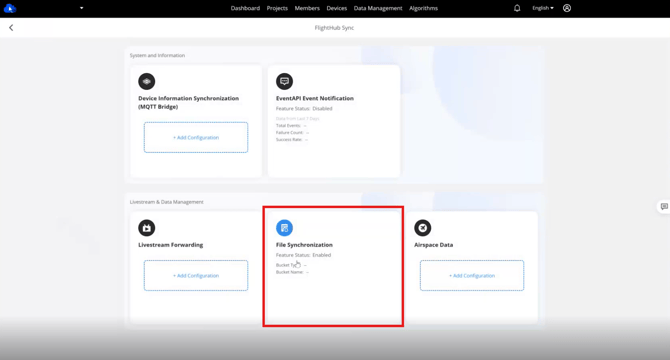
Click on "File Synchronization".
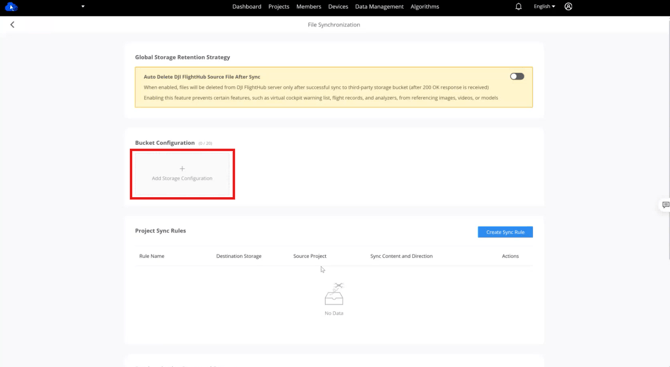
Click "+Add Storage Configuration" .
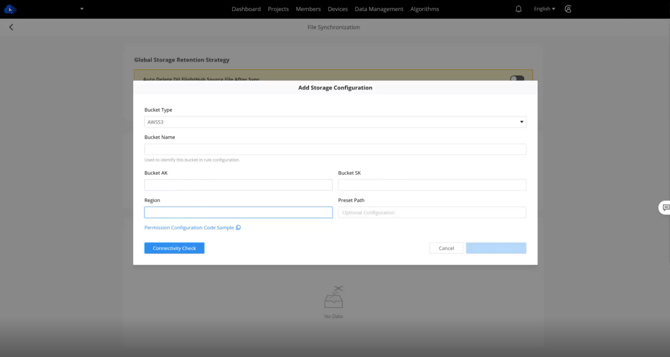
Add the following details in the 'Add Storage Configuration' pop up window:
-
Bucket Type: AWSS3
-
Bucket Name: <S3 bucket name provided by flyfreely>
-
Bucket AK: <access key provided by flyfreely>
-
Bucket SK: <secret key provided by flyfreely>
-
Region: <S3 region provided by flyfreely>
Remove any spaces:
Ensure that none of the fields above contain spaces before or after the copied text.
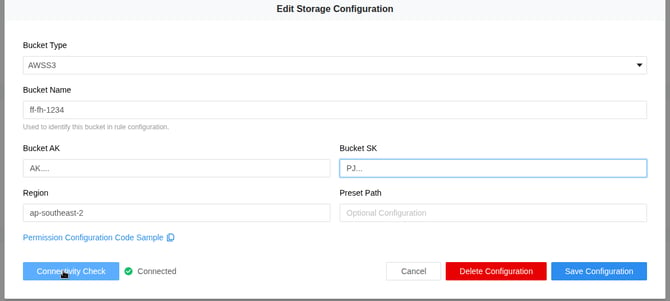
Click on 'Connectivity Check'. A green tick and message "Connected" should appear.
Click 'Save Configuration'.
If the connectivity check fails, please email support@flyfreely.io.

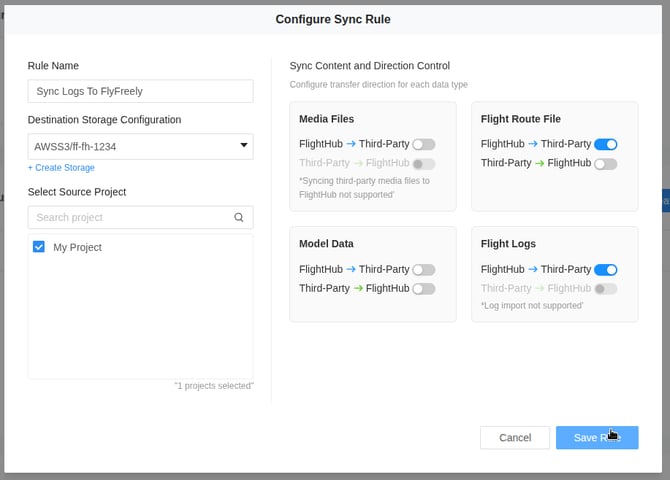
To create the sync rules, click 'Create Sync Rule'.
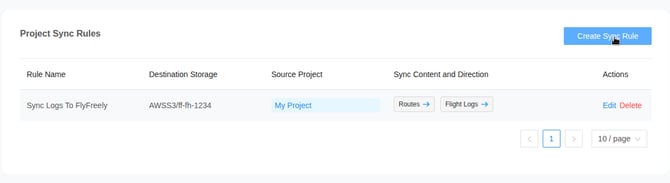
- Give it a name like Sync Logs to FlyFreely
- Select the S3 bucket
- Select the projects
- Switch on the Flight Log Sync for FlightHub -> Third Party
- Click Save Rule
Your Flight Hub 2 integration with FlyFreely is now set up.