![FlyFreely_Logo_White_OnDark.png]](https://knowledge.flyfreely.io/hs-fs/hubfs/FlyFreely_Logo_White_OnDark.png?height=40&name=FlyFreely_Logo_White_OnDark.png)
Please note: Some changes have been made to the Office App since this video was created. We will upload a new video as soon as possible, however most mission planning functionality remains the same.
The mission planning feature is designed to streamline your processes by guiding you through the essential aspects of planning your missions in sequence. The planning screen is subdivided into 4 sections.
This article will cover the following (continue reading for the full tutorial, or skip to the required sections):Create New Mission
Create a New Mission via the Airspace Check
Objectives
Resources
Planning
Documentation
Submit Mission Plan
Cloning a Mission
Create New Mission
(back to top)
The first time you open the FlyFreely app, your Missions widget will be empty. Click the 'Missions' button at the top to navigate to the Missions page. To create your first mission click the blue '+ Create Mission' button on the left hand panel.

Throughout the mission planning screen, required fields are denoted by the red tick symbol. Optional fields have a grey tick. All fields will display a green tick once completed.
You can get additional help and prompts by toggling the 'Enhanced Help' switch at the top-right of the screen.
Creating a New Mission via the Airspace Check
You can also create missions by first conducting an airspace check. This may be useful if you need to do a quick 'feasibility check' before commiting to a full mission plan.
To perform an airspace check, navigate to the location you would like to check on the map. Click the 'Start Airspace Check' button

On the map, click on the area you would like to check. This will display the airspace check results on the left. Please ensure you have the correct ruleset selected and other details filled in.

If the result is 'Advise' or 'Block', you can click on 'View Result Details' to see why.
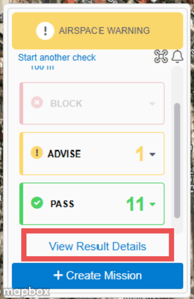
This window will provide more information. The screenshot below illustrates an 'Advise' result, highlighting electricity lines intersecting the flight area.

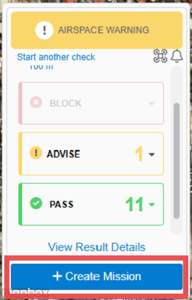
If you want to proceed and create a mission from this check, close the 'Airspace Check Result' window and click the '+ Create Mission button
Objectives
(back to top)
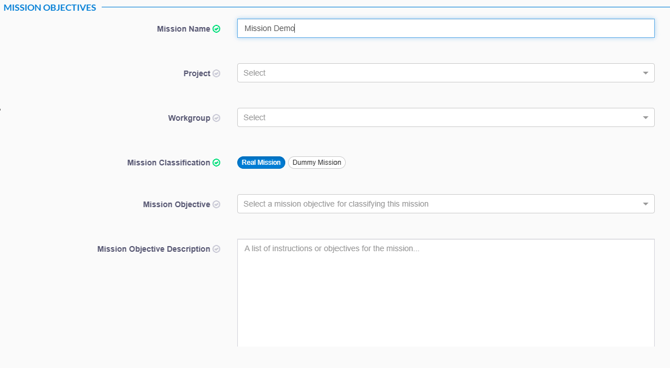
This section outlines your basic mission goals.
- Mission Name: It's good practice to develop a consistent naming convention for your missions.
- Projects (Teams & Enterprise Plan): select the relevant project if applicable, this is set up by your organisation administrator
- Workgroups (Teams & Enterprise Plan): select the relevant workgroup if applicable, this is set up by your organisation administrator
- Mission Classification: Use 'dummy mission' for practice and training missions that won't be physically flown. For more info, see Using Dummy Data.
- Mission Objective: This is a way to differentiate the goals of the mission and is determined by your organisational administrator. It is useful for reporting purposes.
- Mission Objective Description: A summary of your mission objectives. This free-text field can include details such as job number, client information and specific requirements and deliverables.
Once the location is set, you can perform further location checks using the following features.
Planning
(back to top)
In the Mission Planning section, add your mission location and additional details regarding the mission activities.
-
Mission Location: You can draw a new flight area (How to create a location) or select an existing location template.
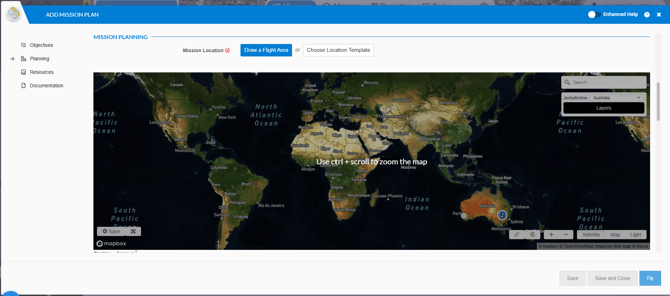
After creating or adding a location, you will see an 'Airspace Information Disclaimer' popup which must be acknowledged before proceeding. This indicates that the in-built airspace check is operational. For more information, see FlyFreely Drone Safety App.

Once the location is set, you can perform further location checks using the following features.
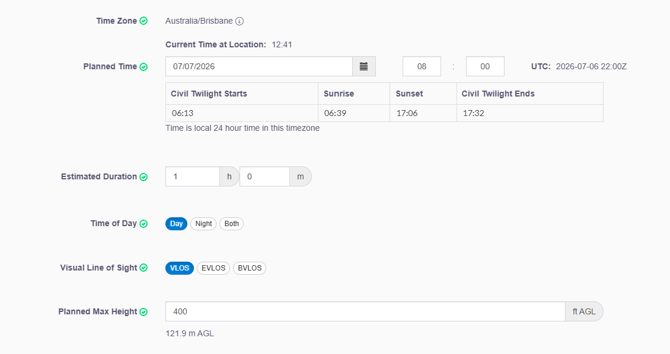
- Time Zone: Automatically set based on your selected location.
- Planned Time: Enter proposed date and start time of your mission.
- Estimated Duration: Enter mission duration.
- Time of Day: Automatically set based on the 'planned time' and 'duration' data entered. Civil twilight start/end are also shown for your selected location (used by airspace check).
- Visual Line of Sight: All missions should be conducted VLOS (Visual line of sight) unless specific approvals have been granted by CASA for other operation types. If EVLOS or BVLOS is selected, ensure you have selected the correct mission workflow.
- Planned Max Height: Enter the maximum height you need to complete the mission (used by airspace check).
- Nearby Aerodromes: Allows you to search by aerodrome name, code or distance from your flight area, and add any relevant information to the mission plan.
- Mission NOTAMs: Search, read and select relevant NOTAM messages to add to your mission plan. See Nearby Aerodromes/NOTAM Check for more information on these features.
- Mission LOTAMs (Enterprise Plan): This is set by the organisation administrator/CRP. These function as Local Notices to the organisation. You may be required to acknowledge, if relevant. For more information, please see LOTAMs.

Warnings and Blocks: This subsection displays any warnings or blocks from the Airspace Check.
The airspace check will update as you add details into this section, in conjunction with the location and mission workflow (ruleset) selected above. For more information on this feature, see FlyFreely Drone Safety App .
Resources
In this section, you will enter the details of the resources and authorities to be used for the mission.
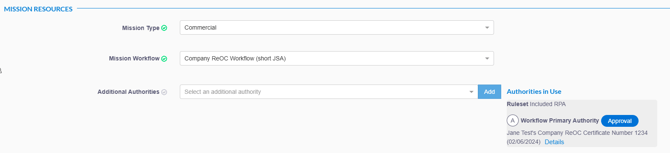
- Mission Type: Select the type of mission to be flown (training, commercial, testing or specialised procedures) for record keeping purposes.
- Mission Workflow: Workflow options will depend on your organization's configuration, and the selected workflow determines which ruleset is used by the airspace checker. See this article for more info on workflows.
- Additional Authorities (Teams + Enterprise Plan): Option to add additional authorities that have not been pre-configured to a mission workflow.
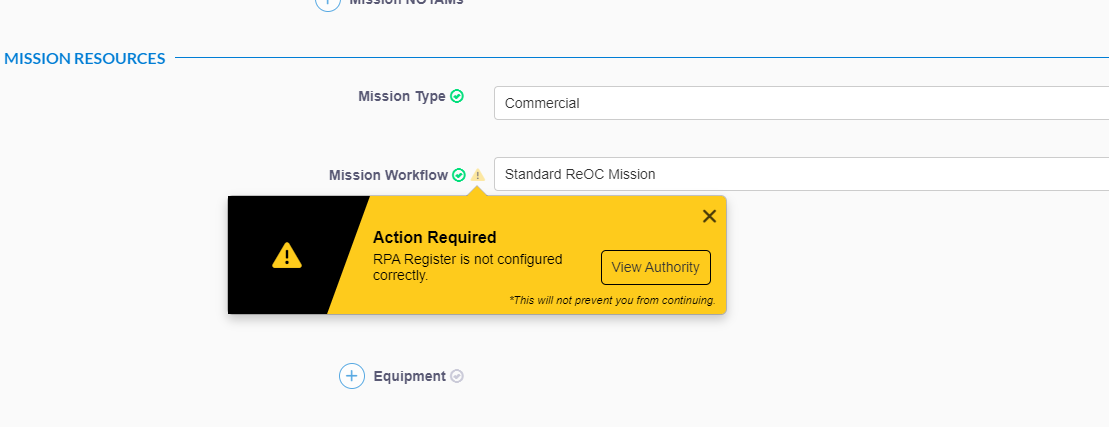
When a workflow is selected, the app will check the associated primary authority to see whether it is configured correctly. If there are any issues detected, there will be a yellow warning icon displayed. Clicking on this icon will allow a user with the relevant permissions (organisation admin) to view and edit the authority to resolve the issue. If you do not have the permissions, please speak to your organisation administrator.
- RPA: Select the RPA to be used on this mission. You can make repeat selections if you intend to take more than one RPA on this mission (eg a backup).
- Equipment: Any non-RPA devices to be used on the mission (eg ground stations, payloads).
Note: In order to select an RPA / Equipment for a mission, it must have already been added to the system (you can't add items from the mission planning screen). You can add these items via the relevant widget on the 'Manage' dashboard screen.

When selecting an RPA, the list will be divided into 'Active', 'Not on Register' and 'Expired' sections, based on the register status of each RPA. 
Any RPA falling into the 'Active' section should have all required documentation up to date and be in serviceable condition.
If your required RPA isn't on the associated authority register at all, it will look like this:
This indicates that the selected RPA hasn't been approved to operate under the selected authority, or that it hasn't been added to that authority register in the system. Speak to the organisation administrator.
Next, add the details of any personnel associated with this mission.
- Remote Pilot in Command (RPIC): This person has overall 'in field' responsibility for the conduct of the mission. Once your mission is ready to fly, it will appear in the field app for the RPIC only.
As with RPA, the register status of remote pilots is highlighted for reference. As above, any issues detected in the register can be resolved by the visiting the relevant authority register. Again, if you do not have the permissions for this, please speak to your organisation administrator.

- Crew: You can add any additional crew here. This might include additional Remote Pilots, or spotters / observers

- Point of Contact: The RPIC is added by default. This is a free text field and can be modified if required.
- Point of Contact Details: Enter the contact details

- Crew Notes: Enter any other relevant information regarding your crew, specific duties etc.

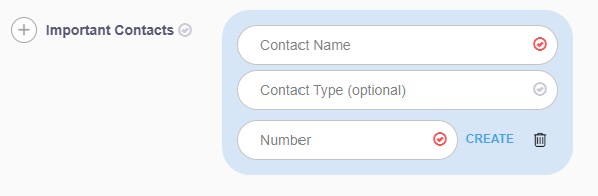
- Important Contacts: Add additional contacts to this mission plan if necessary, these details will be available on site (via the field app). These could be site management, emergency services etc. Contact details added in the 'nearby aerodromes' section above will be displayed here automatically.
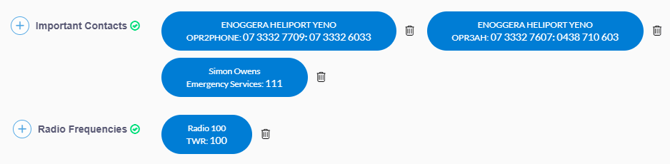
- Radio Frequencies: Add any additional VHF frequencies you wish to monitor. Frequencies added in the 'nearby aerodromes' section above will be displayed here automatically.
Documentation
(back to top)
The forms included in this section are based on the selected mission workflow. For instructions on configuring workflows, see Configuring Workflows
Required forms will display a red tick symbol. Click start to complete each form. Once all required forms are complete, the 'Submit for approval' or 'Fly' button (depending on workflow) will be unlocked and you can complete the mission plan.
You can also attach any other relevant files that you wish to include in your mission plan using the 'Select or Drop Files Here' button.
In some cases, you won't find any additional documentation here and you should be able to scroll to the bottom of the screen and select Submit for Approval or Fly depending on your workflow configuration.

You can import form responses from previously planned or completed missions. Click the ... button on the right hand side of the documentation section, and select 'Prefill from other mission'. Once you've selected a mission and imported your responses, click continue to check the form then click complete.
Note: This import will only work with missions using the same workflow and forms (and the same version of each form).

Submit Mission Plan
(back to top)
Once all required fields have been completed, the Submit for approval or Fly button will be unlocked, depending on the selected workflow.

For workflows requiring approval, your plan will be sent to the the relevant approver/s (usually Chief Remote Pilot) to check and approve. Once approved, the mission will display as 'Ready to Fly' and will appear in the field app for the nominated Remote Pilot in Command.
For non-approval workflows, clicking Fly will send the mission directly to 'Ready to Fly' status and it will show in the field app.
Multiple Approvals
This supports missions with multiple authorities that require approval. The mission plan will display the multiple approvals in grey boxes:

Once submitted, the mission plan will be sent to the relevant approver/s to approve.
To learn about using the FlyFreely Field App to record your mission, see How to complete your mission in the field app.
Cloning a Mission
You can easily clone a mission to save time on mission planning. From the missions table, click on the clone icon to clone the mission.
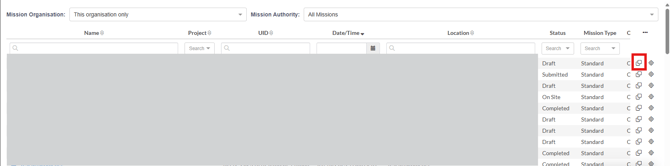
This will copy all details of the mission, including any forms at the mission planning stage. The form will still show as incomplete so you will need to click on the form to see the previously filled fields and amend as necessary. If there are no changes, simply click on 'Complete'.
Amendments
A reminder to update the date and time of the mission plan before you 'Submit' or click 'Fly'.
We also recommend updating the mission name to make it easier to identify when searching post mission.