When an organisation invites you to join, you'll need to register for a FlyFreely account and complete the initial onboarding steps to set up your profile before you can access the organisation’s account.
Skip to relevant sections:
FlyFreely Office App (desktop only)
Invitation Email
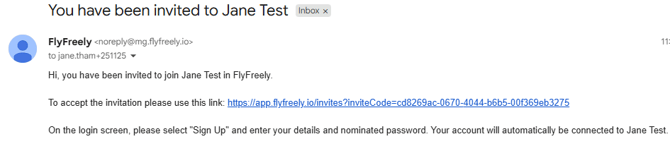
To start, you will receive an email from "noreply@mg.flyfreely.io". It should look something like this:
Check your junk/spam folder, if you haven't received anything.
Click the link in the email to accept the invite, the link will open in a new window/tab.
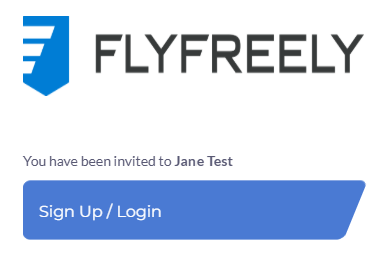
Sign Up
Click 'Sign Up / Login' button.
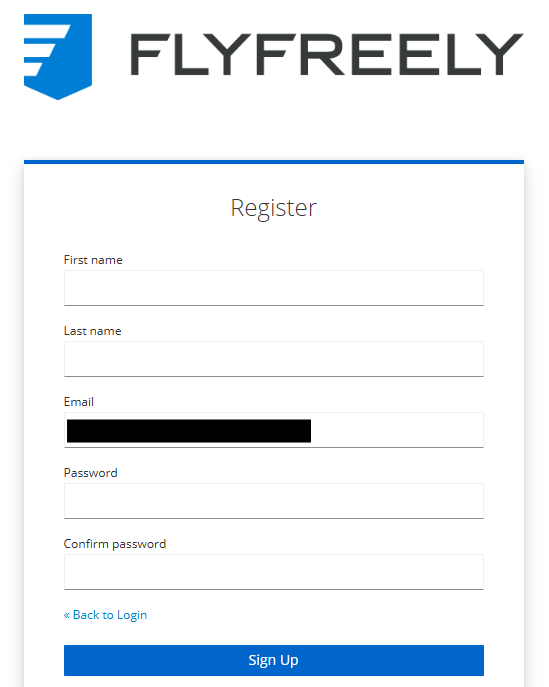
Register
Register by completing all fields, then click 'Sign Up'
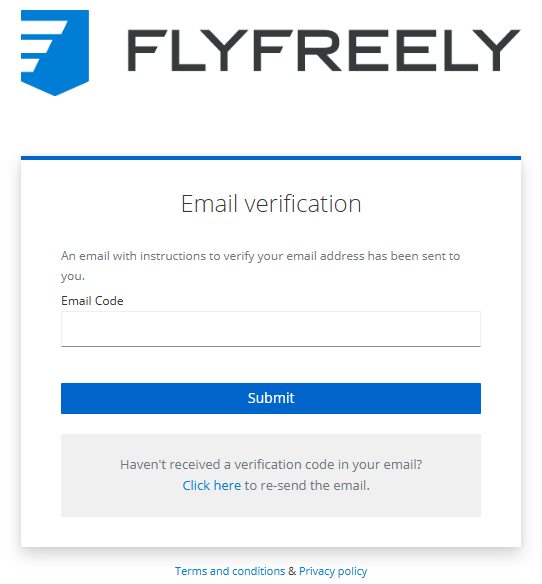
Verify Email
You will be sent a verification email once you click 'Sign Up'. The email will look something like this:
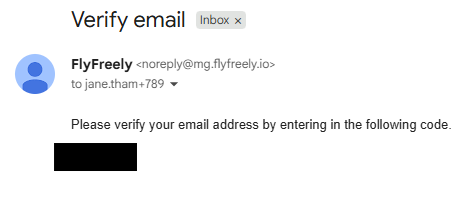
Copy the code from the email and paste in the 'Email Code' field. Click the 'Submit' button.
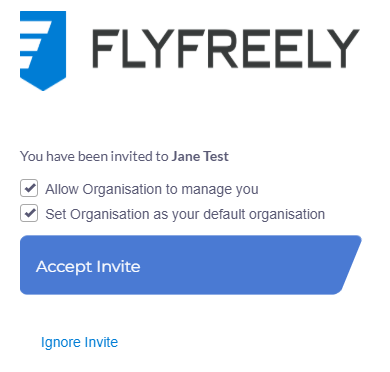
Accept Invite
You have the option to allow the organisation to manage you. This means the organisation admins of the account can upload certificates on your behalf and manage your profile.
Unless you have another organisation you are part of with FlyFreely that would be your "main" account, we suggest leaving the 'Set Organisation as your default organisation' selected.
Click 'Accept Invite' button.
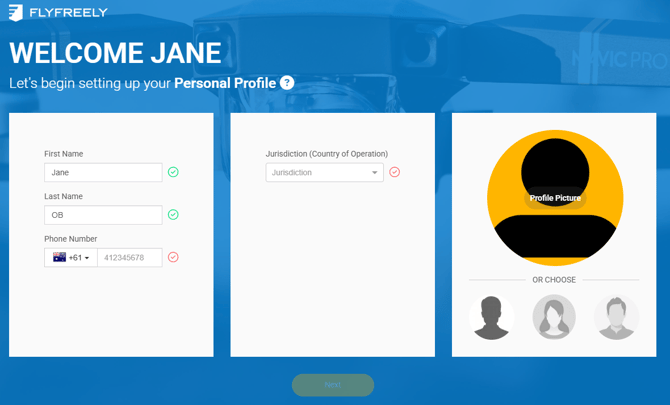
Personal Profile
Complete the set up of your personal profile. The red tick indicates a mandatory field, once completed it will turn green.
Once all mandatory fields are completed, the yellow 'Next' button will be available to click on. Click 'Next' to move onto the next stage.
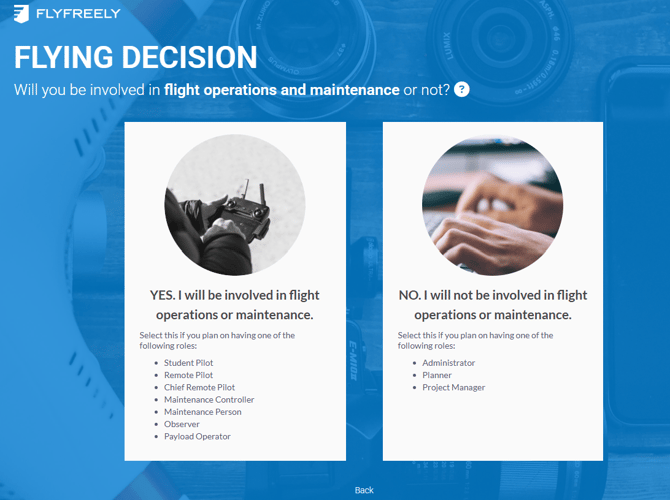
Flying Decision
Please read carefully and click on the appropriate box as this will determine your permissions. Click anywhere in the box to select. This will take you to the next stage.
Personal Authorities
Add the relevant personal authorities by clicking on the box. Complete the relevant fields in the pop up window and click 'Save'. Once you have added all relevant personal authorities, click 'Next'.
Note: if you don't have the information at hand, you can add this to your profile later on via the desktop FlyFreely office app.

Company Decision
It is important to select the box most appropriate for you.
If you have been invited by an organisation to join their account, click on 'NO. Join existing organisation'.

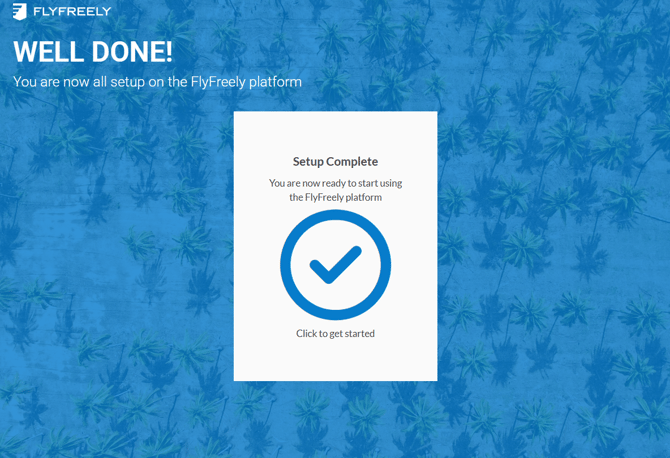
Setup Complete
If you clicked 'No. Join existing organisation', you have completed your set up. Click on the big blue tick to access the company organisation account.
FlyFreely Office App (desktop only)
You will be brought to the desktop FlyFreely Office App. This is different to the FlyFreely Field App.
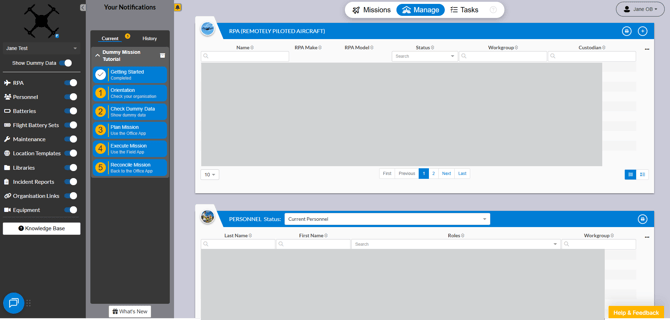
If you need to access the FlyFreely Office App, feel free to bookmark this login page: https://app.flyfreely.io/login