This article will cover the following:
What you can do with the FlyFreely API
Generating an API Key
API Documentation & Examples
What you can do with the FlyFreely API
With the FlyFreely API, users have the opportunity to access mission records and flight data within their own environment. Furthermore, the API can be utilized to enhance mission planning and maintenance systems by seamlessly integrating them into existing workflows and software suites.
API access can be requested as part of our enterprise plan. After being granted access you will receive the ability to generate API keys and start using our API endpoints in your own development environment or software suite.
Generating an API key
API keys are generated from your profile menu. To do so, follow the steps below:
- Click on your name in the top-right corner of the dashboard to open the settings menu and select "Profile".

- Select "API Keys" in the sidebar.

- In the API Keys view you can generate new keys, or view and delete your existing keys.
- To generate a new key:
- Type a name for the key. This can be any unique identifying name to allow you to keep track of keys if you generate more than one. Ideally it should be something that makes sense to you like a company name or what you'll be using the key for.
- Select whether to allow any organisation you own or are a part of to use this key, or whether to restrict access to only selected organisations. This can be useful for managing API access across parent-child organisation relationships.
- Select which permissions to allow for each major API type. The types are Missions, Personnel, Resources (RPA, batteries and equipment), Organisation (organisation administration such as authorities and workflows), Profile (related to your personal profile such as authorities and flight history), and Flight Logs. For each type you can block access (None), or allow Read, Write or, in the case of Flight Logs, Upload.
- Once you are happy with the settings, click "Create API Key"

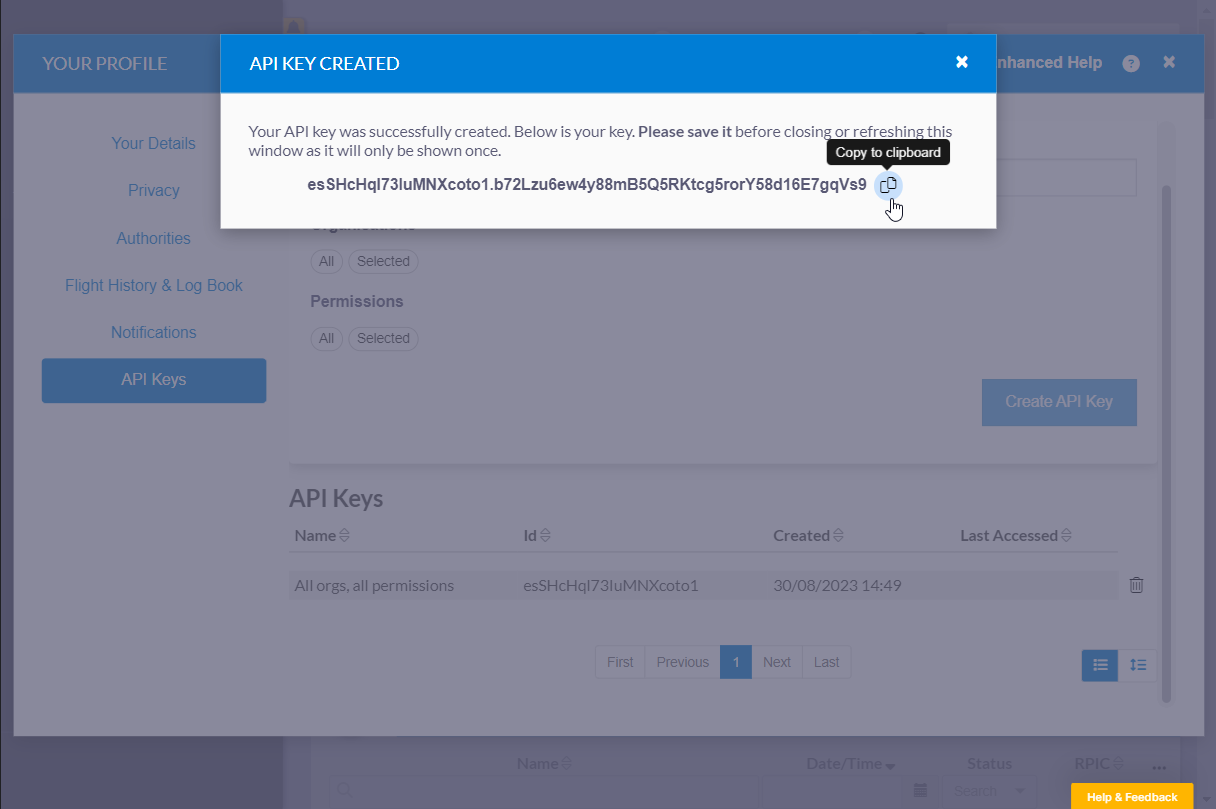
- Once you create the API key, you will be presented with a popup dialogue that contains the API key itself. DO NOT CLOSE this dialogue, as the key will only ever be shown this one time. Click the copy button, or highlight and copy the key and either paste it directly into your code or paste it somewhere safe. Once you are sure you have the key saved, close the popup.
You should now see the key's name, unique ID and details about when it was created and when it was last accessed listed in the table towards the bottom of the screen.
Note: the ID in the list is not the API key, but merely a unique identifier. The key itself will only ever be visible once, during the creation process.
From this table you can also monitor when the key is used and revoke the key by deleting it at any time. Deleting a key is permanent and if done in error you will need to create a new key to restore functionality.
Remember: It is crucial to handle the generated API keys securely and grant only the necessary permissions to only organisations that require them in order to minimize the potential risks associated with leaked or lost keys. These keys have the potential to provide access to sensitive personal and company information via the API if stolen. If you suspect that your API key has been compromised, please reach out to FlyFreely immediately so that appropriate measures can be taken to address the issue.
API Documentation & Examples
(back to top)
Technical documentation can be found here: https://api.flyfreely.io/#/
The following example uses Python and the Requests library (example only)
Listing and Fetching Missions
import requests
from pprint import pprint

API_KEY="xxx.yyy"
ORGANISATION_ID=ZZZ # From your URL when logged in

headers={'Authorization': 'Token ' + API_KEY}


# Fetch the mission summaries
resp = requests.get('https://app.flyfreely.io/extapi/missions', params={'organisationId': ORGANISATION_ID}, headers=headers)

mission_list = resp.json()

if resp.status_code == 200:
    print('\n'.join([str(mission['id']) for mission in mission_list]))


# Fetch the full mission details for the first mission
resp = requests.get('https://app.flyfreely.io/extapi/missions/' + str(mission_list[0]['id']), headers=headers)
full_mission = resp.json()
pprint(full_mission)
Running the above code outputs the following:
$ python list_missions.py
725
726
...
37146
37148
37153
37196
{'actualEndTime': None,
 'actualLocationId': None,
 'actualStartTime': None,
 'additionalAuthorities': [],
 'aerodromesOfInterest': [],
 'airspaceAuthorisationList': [],
 'approvals': [],
 'attachments': [],
 'availableActions': {'canApprove': False,
                      'canCancel': False,
                      'canComplete': True,
                      'canDelete': True,
                      'canEdit': False,
                      'canFinalise': True,
                      'canPrepareToFly': True,
                      'canRequestFinalisation': True,
                      'canUnfinalise': True,
                      'hasDelete': True,
                      'hasEdit': True,
                      'hasFinalise': True},
 'checksumModificationTime': '2018-10-22T00:45:59.000Z',
 'completionMessage': '',
 'craftIds': [186],
 'craftNicknames': ['DJI Phantom 3'],
 'crafts': [{'callSign': None,
             'craftModelId': 1,
             'creationTime': '2018-10-22T00:34:52.000Z',
             'disposalDate': None,
             'id': 186,
             'initialFlightTime': 7200,
             'insuredValue': None,
             'internalSerialNumber': '08RDE8700103VX',
             'isDummy': False,
             'maintenanceScheduleTriggerActivation': None,
             'manufacturerSerialNumber': '404040440404040404',
             'maximumVisualDistance': None,
             'modificationTime': '2023-05-03T04:49:30.191Z',
             'nfcUid': None,
             'nickname': 'DJI Phantom 3',
             'organisationId': 247,
             'organisationName': 'Signoff Testing',
             'procurementDate': '2018-10-07',
             'rpaTypeId': 1,
             'status': 'UNDER_MAINTENANCE'}],
 'creationTime': '2018-10-22T00:41:34.000Z',
...}