Before you can start planning missions in the FlyFreely app, you need to add personnel and assign them roles (eg Remote Pilot, Planner etc). For more information on the various user roles, see Understanding User Roles.
This article will cover the following:
Adding and removing roles from an existing user
What are Personnel?
In the FlyFreely platform, the term Personnel refers to any user of the software. This might include Remote Pilots, other crew (observers or assistants), administrators and anyone else in your organisation who needs access to the system.
Inviting Personnel
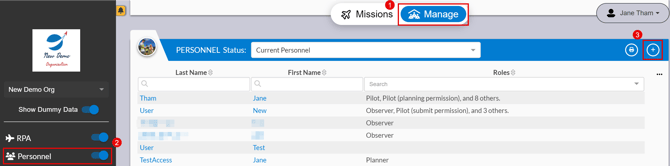
To start, make sure you are in the Manage dashboard and the Personnel widget is toggled to visible.
1. To add personnel, including remote pilots, click the plus button (+) on the Personnel widget.
2. This screen allows you to invite new users to the organization. To invite a user, enter their email in the box and click add. This will add them to the 'invitee list'.
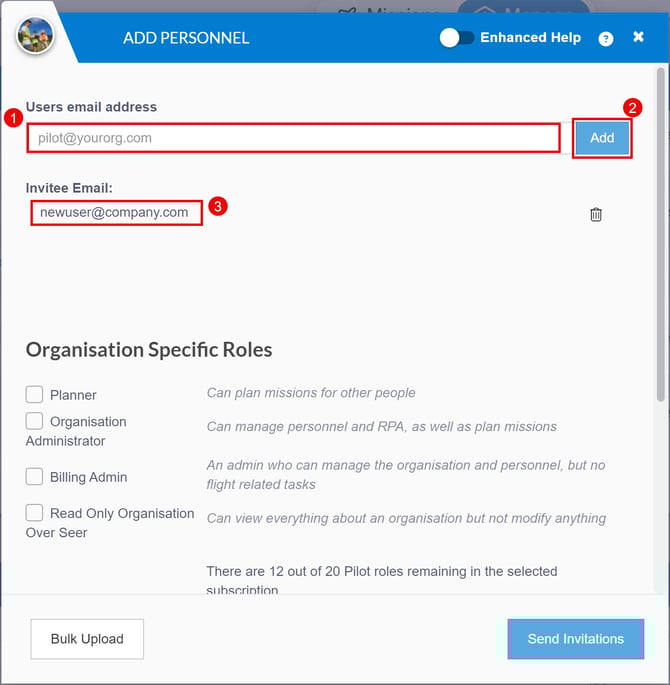
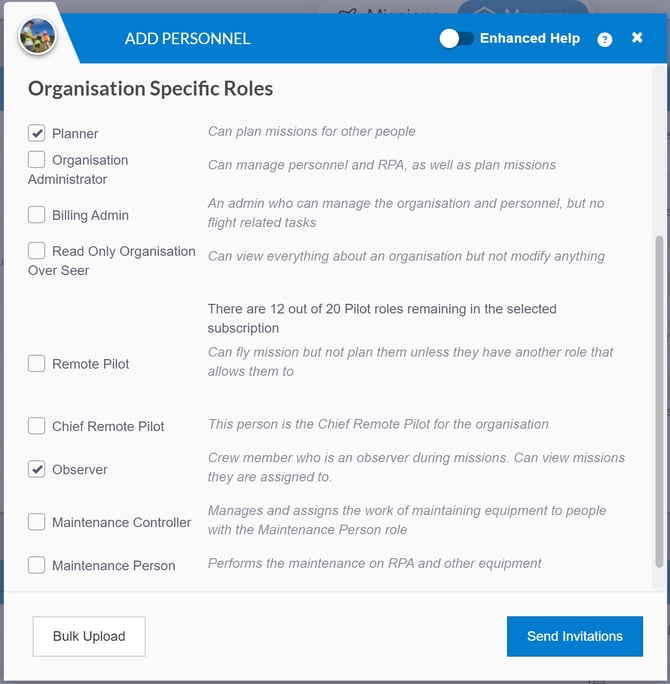
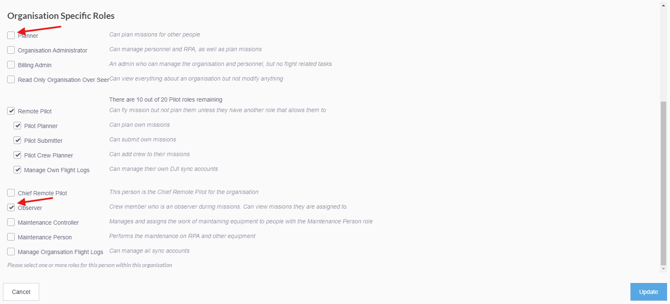
3. Next, select the roles you wish to apply to the user. For more information on the various user roles, see Understanding User Roles. All users must have at least one role.
Note for mission planning:
If your new user has the Remote Pilot role selected, they will now be available in the ‘Remote Pilot in Command’ and ‘Crew’ sections of the Mission Planning dialogue.
Remote Pilots and software licences go hand in hand
In order to apply the 'Remote Pilot' role to a user, you must have a software license available. Number of available licenses is displayed next to this role.
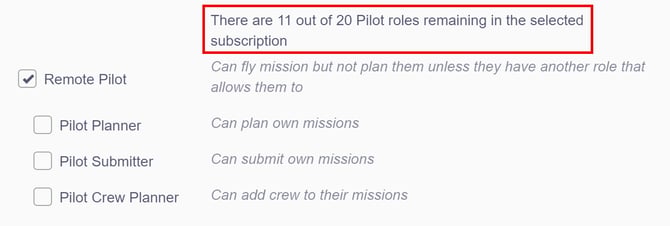
If you don't have any licenses remaining, the 'Remote Pilot' role will be unavailable until additional licenses are freed up (removed from other remote pilot users) or additional license/s are purchased.

4. When user roles have been applied, click Send Invitations. This will send email invitations to all users in your 'invitee' list. Once each user has accepted the invitation and created a password, they will be added to your personnel list and can start using the software.
Pending Invites
(back to top)
A invite is pending when a user has been invited but hasn't yet responded and signed up.
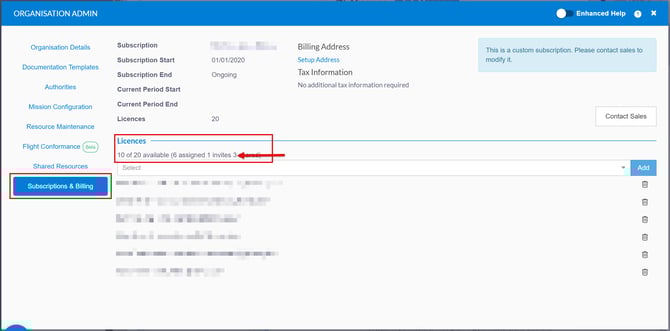
Licences are assigned as soon as an invite is sent. If you notice that you have fewer available licenses then expected, check the pending invites to see if there are any outstanding (only applies to remote pilot roles).
To see how many licences are consumed by pending invites, visit Organisation Admin > Subscriptions & Billing
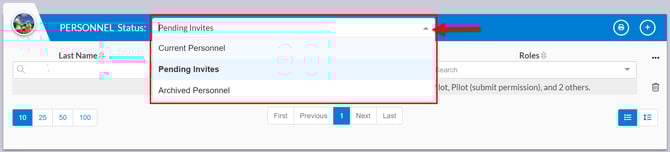
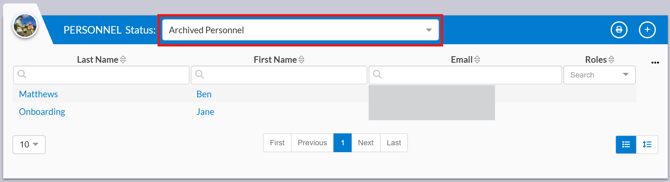
To view pending invites, go to the personnel widget and click on the dropdown menu to change the status. You can also filter the list to display: Current Personnel, Pending Invites or Archived Personnel.
Delete an Invite
If you want to delete an invite, go to the personnel widget, change the status to 'Pending Invites'
and click on the bin button.
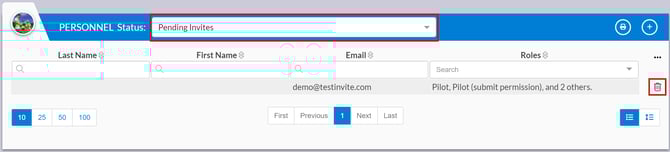
Invites cannot be resent. If you need to send a new invite to a user, remember to delete the old one first to avoid duplication of licenses.
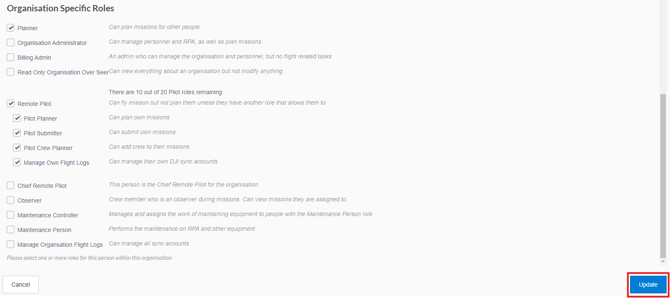
Adding and removing roles form an existing user
1. To add or remove a role from an existing user in the org, start by going to the personnel widget from the manage dashboard.
2. Click on the users name

3. Click on 'Edit'

4. Tick the role to add or untick the role to remove from the user
5. Click 'Update'. This will now update the users role.
Archiving/Removing a User
To archive a user means to remove this person from the current organisation. Once archived, they will no longer have access to this org.
There are 2 ways to archive a user: Unticking all roles or using the archive button.
Unticking all roles:
- Click on the users name in the personnel widget
- Under 'User Details' tab:
- Click 'Edit' and untick all roles from this user, then click 'Update'
OR - Click 'Archive' button

- Click 'Edit' and untick all roles from this user, then click 'Update'
- A confirmation box will pop up, read carefully before clicking 'Yes' to agree.
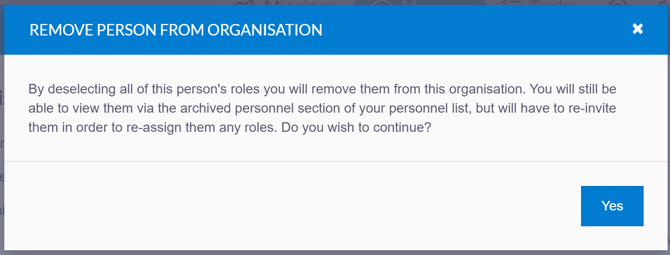
- You have now archived this user and they no longer have access to your organisation. They will now appear under your archived users.

Re-inviting archived users
Once you have archived a user, you cannot 'unarchive' them. To allow the user access to the organisation again you will need to re-invite them as if they were a new user. Follow Inviting Personnel to do this