Available for Teams + Enterprise users only
NOTE: For operators using On condition maintenance (per their operations manual) do not need to set up schedules. Schedules are generally intended to replace comprehensive pre- and post-flight inspections. If transferring from 'on condition' to schedules, your operations manual should be updated to reflect this change.
1. Configure RPA
For existing RPA, select the RPA from the RPA widget on the dashboard. Click EDIT and you will see that the EDIT RPA screen now includes an Initial components section. The available fields will depend on the RPA type. 
If you can't see this section for your RPA, please contact support@flyfreely.io for assistance.
Repeat step 1 for any RPA you wish to include in a schedule.
2. Create a Schedule
Once you've configured at least 1 RPA, the next step is to create a maintenance schedule. Note that a schedule doesn't have to relate to a specific RPA type or model, but if you operate multiple RPA types with different component types, it usually makes sense to set them up this way.
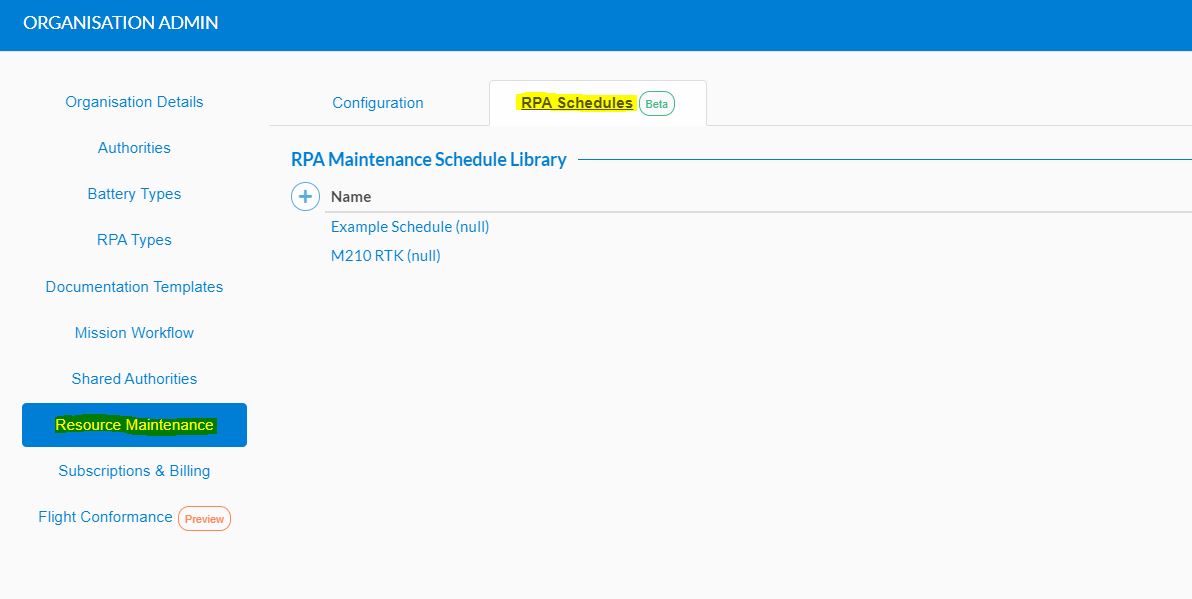
Visit Organisation Admin from the profile menu, and select Resource Maintenance. Select the RPA Schedules tab and click the + button to create a new schedule.
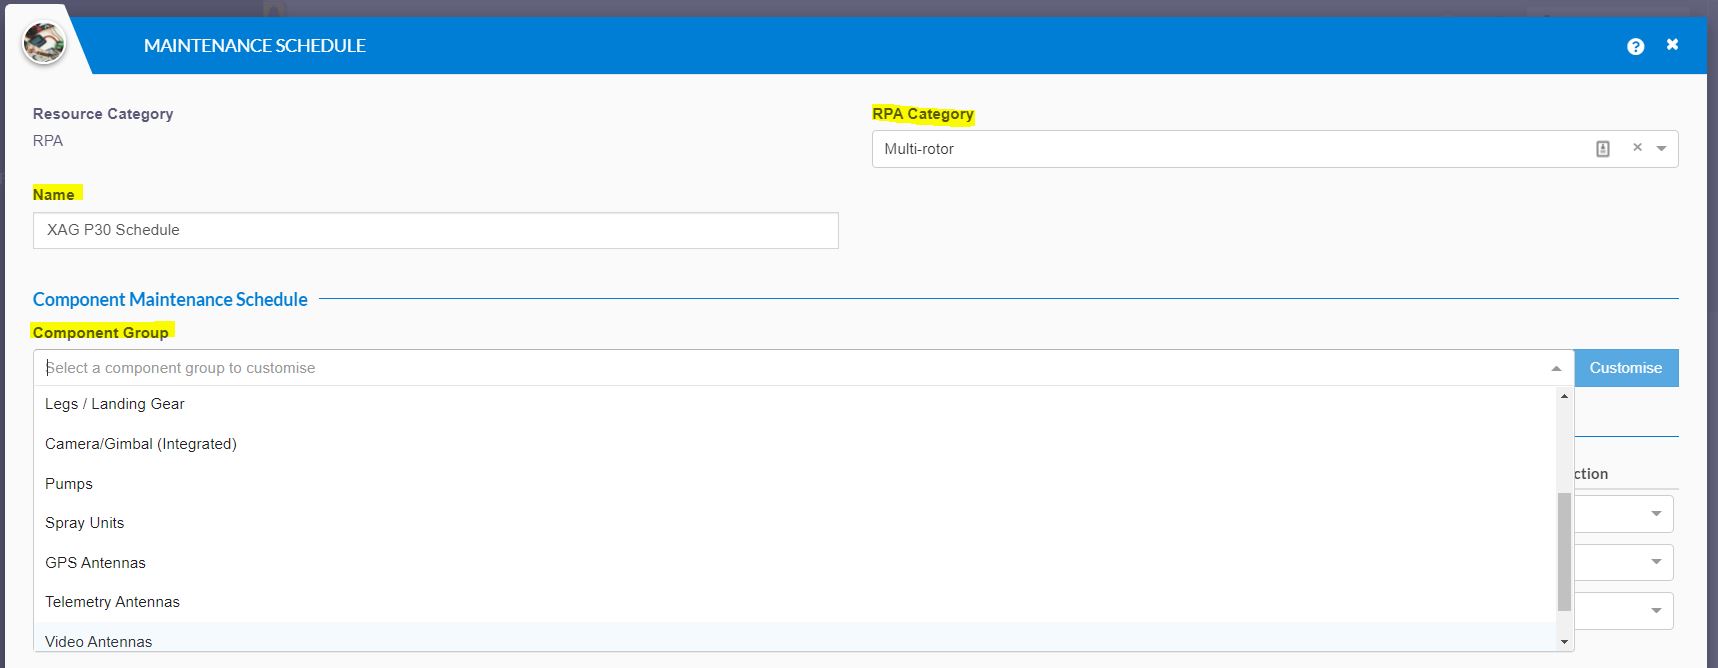
On the Maintenance Schedule screen, first select the RPA type (Multi-rotor, fixed wing etc) and give your new schedule a name.
Add Component Groups
You can then begin adding relevant component groups to your schedule.
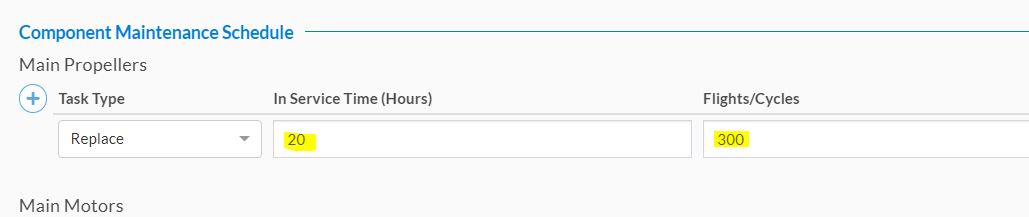
Each component group you select gets added to the component maintenance schedule, as shown below.

Add Tasks
Now for each component group in the schedule, use the + button to add a task. The available tasks are:
- Inspect
- Replace
- Repair
You can add multiple task types to each component. In the below example, the propellers would be inspected every 20hrs and replaced every 100hrs.

You can use any combination of condition/s (In service time, Flights/Cycles and Calendar time) for each task. The task will be triggered by whichever condition is met first. Once the maintenance task has been completed, all conditions will be reset.
In the following example, the replace task will be triggered by either 20hrs in service or 20 flights elapsing - whichever comes first.
Repeat this process for any other component groups you wish to include in the schedule. Once you've added all required component groups and tasks, click Save and Close to save the schedule.
Set up Triggers
This step customises the timing of triggers (notifications) in your schedule. Notifications can be triggered by any or all of 3 triggers:
- Upcoming
- Due
- Overdue
Notifications will be triggered by whichever trigger occurs first.
In the first example, a notification will be triggered by either
- 5 flight hours remaining until maintenance task is due or
- 50 flights remaining until maintenance task is due.
The action triggered in this case will be a simply notification, which will go to the maintenance controller.

The next example shows the addition of a Due trigger. This is set to 0hrs by default but can be changed to 'time remaining' if required (eg entering a 1 will cause the trigger with 1hr remaining). In this case, the triggered action is the creation of a Maintenance Request, which can then be assigned to an appropriate team member to complete the task.

The Create Maintenance Request trigger will also send a notification to the Maintenance Controller.
Finally, you can set an Overdue trigger. Entering a positive number here will trigger an action that many hours after the task is due.
In this case, you may wish to set the action to Take out of service. This option will change the RPA status to 'unserviceable' and notify the maintenance controller, who can then schedule the required task and bring it back into service.

Once your required triggers have been set, click Save and close to save your schedule.
3. Apply the schedule to your RPA type/s
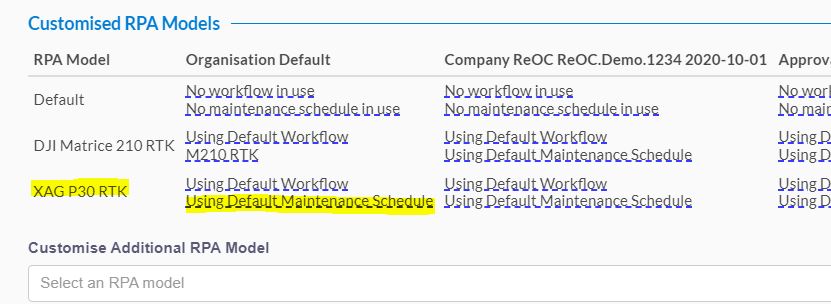
Now that your schedule is set up, you must choose which RPA types will be subject to that schedule. To do this, select the configuration tab.

The RPA-specififc workflow component of this area will be covered in a seperate article in the future. Pleas contact support if you have any questions regarding RPA workflows.
.
Select your chosen RPA type from the dropdown menu highlighted above, and click customise. The RPA type will be added to the model list. To select your new maintenance schedule and apply it to the type, click the text Using default maintenance schedule.
From the dropdown menu, select your new maintenance schedule and press the 'tick' button to apply it. A pop-up will appear confirming how many RPA are affected by the change. Click OK to confirm the change.
Your schedule has now been applied to your chosen RPA type.
Overriding Schedules
The above procedures will apply the schedule to all RPAs of the selected type. If you wish to exclude one or more specific craft from the schedule, or place them on a different schedule, you can override the set schedule.
From the FlyFreely dashboard, scroll to the RPA widget and select the specific RPA you wish to change. Select the Maintenance History tab:
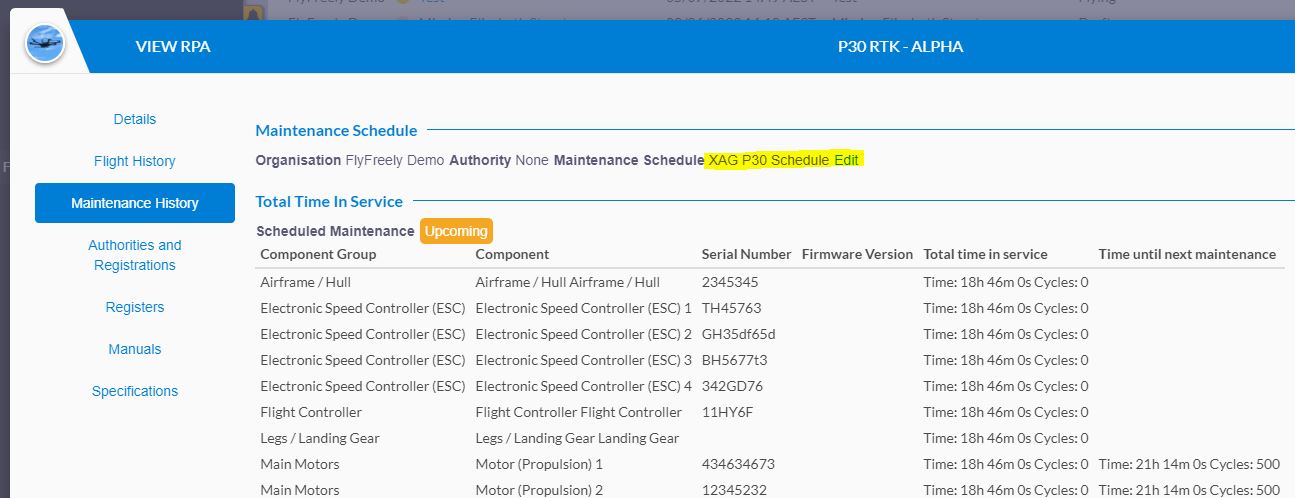
Find the maintenance schedule listed at the top of the page and click Edit. From the dropdown you can select any schedule, or select Organisation Default. Click Assign to save the change.
Understanding the Maintenance Schedule Window
Once your schedule is configured and applied to the appropriate RPA/s, the Maintenance History tab for those RPA will look like this:
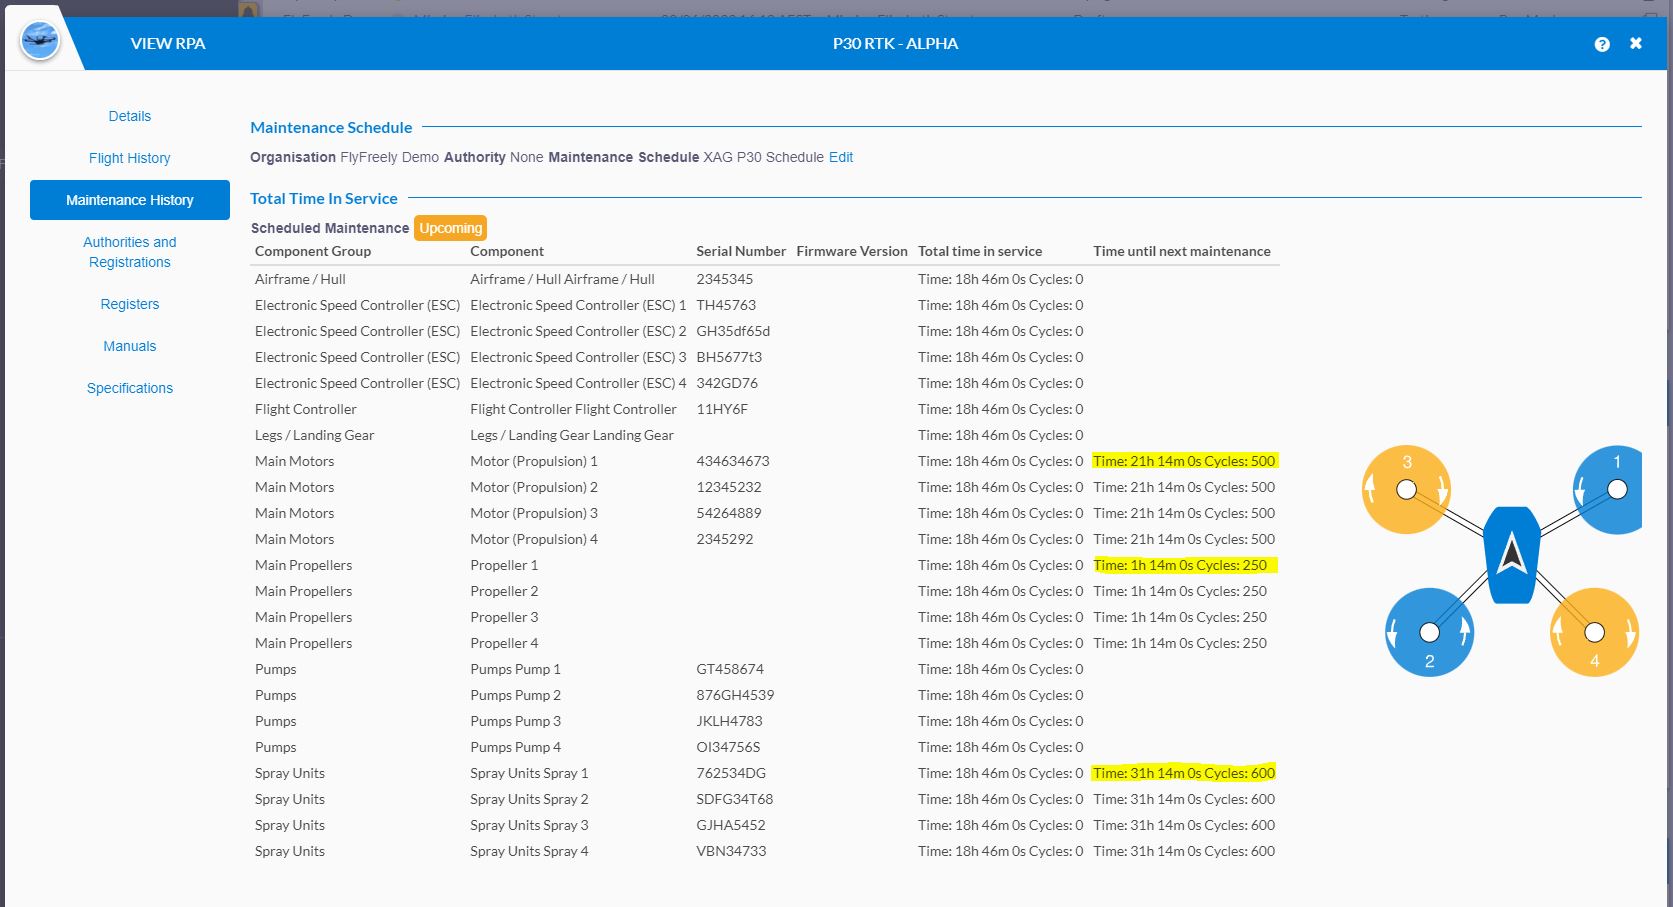
All components will display Total Time in Service, which is simply the time each component has logged in FlyFreely (based on logged flight times) plus any historical time entered when the RPA was added to your account (if that component was present at the time).
Components which are included in your maintenance schedule will also display Time until next maintenance. As the name suggests, this counts down to the next 'due' maintenance task, based on your criteria of service hours, cycles or calendar days.

When the required maintenance task has been completed, the Time until... figure will be reset to that specified in the schedule.
For details on completing maintenance tasks, please see our article.
Triggers
Notify
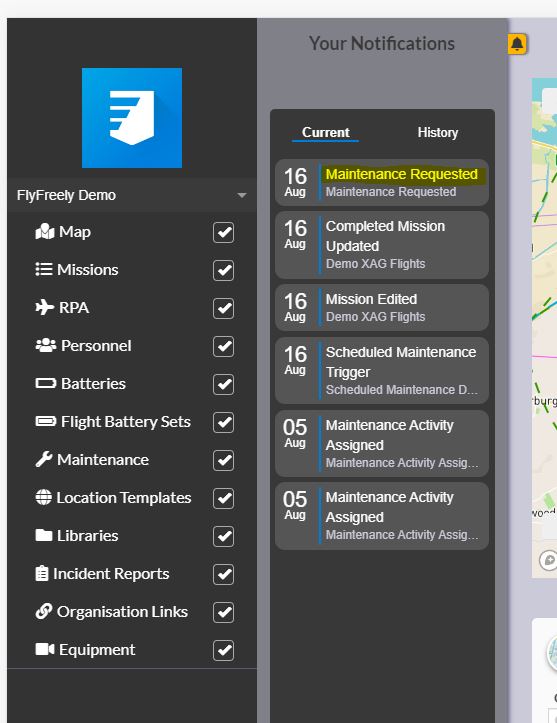
When one or more of your notification trigger conditions are met, a notification will be sent to the nominated Maintenance Controller (MC) for your organisation, as shown below.
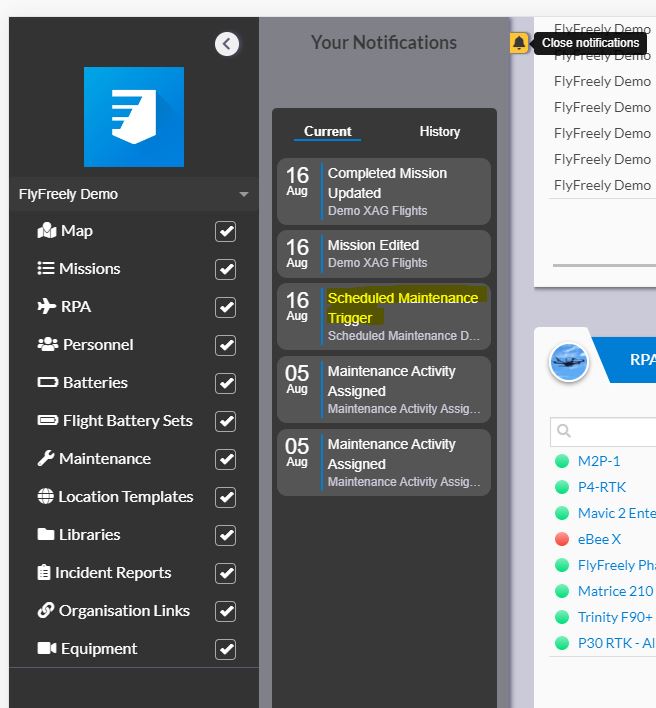
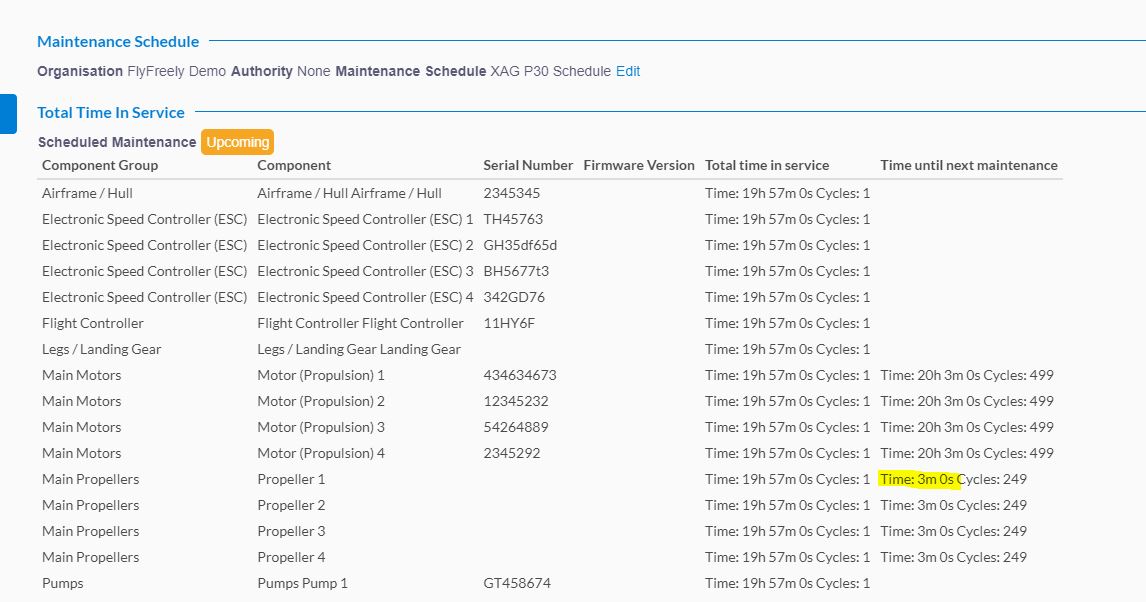
Clicking on this notification brings up the RPA's Maintenance History screen. The status is upcoming, with 3 minutes remaining until the next maintenance is due.
Raise Maintenance Request
When this action is triggered, a maintenance task for the required action is generated, and the maintenance controller recieves a notification of this.
 The maintenance controller can then either action the request or assign the task to another maintenance person.
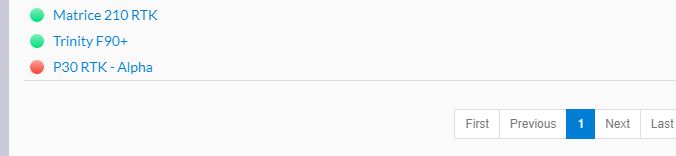
Take Out of Service
This trigger sets the RPA status to unserviceable. This is displayed in the RPA widget as a red icon next to the RPA.
If the RPA is used to plan a mission, it's status is again highlighted (it's still possible to plan the mission, as the software has no way of knowing if you plan to complete the maintenance in the interim).

Only the nominated Maintenance Controller has the ability to return an RPA to 'serviceable' status.
In this instance, the Maintenance controller should either complete the associated maintenance task or assign it to another individual who should then complete it to bring the RPA back into service.
Scheduled Battery Maintenance coming soon
Scheduled maintenance for batteries isn't currently supported. Once available, this article will be updated.
If you encounter any issues or have specific questions in regards to the configuration of maintenance schedules, please contact us at support@flyfreely.io