![FlyFreely_Logo_White_OnDark.png]](https://knowledge.flyfreely.io/hs-fs/hubfs/FlyFreely_Logo_White_OnDark.png?height=40&name=FlyFreely_Logo_White_OnDark.png)
For missions requiring approval, the mission planner must submit the mission to the relevant approver.
Approvers can be any of the following: Chief Remote Pilot, Senior Remote Pilot, or a Nominated Approver.
Once submitted, the mission status changes to Submitted, and the mission cannot be flown until it is approved by the relevant approver in the Office App or Field App.
Approvers are notified of submitted missions through the notifications bar and by email.
For instructions on setting up Senior Remote Pilots (SRP) in FlyFreely, see Adding a Senior Remote Pilot (SRP).
For instructions on nominating approvers see Nominating Mission Approvers via Company Authorities
This article will cover:
Approving via the Office App (Legacy)
Approving via the Office App (NEW)
Approval Conditions Library (Enterprise)
Approving via the Field App (Teams and Enterprise Customers only)
Approving via the Office App (Legacy)
The mission can be access either from the dashboard mission list, or via the mission name in the notification list.
Once the mission is open, you will have the option to Perform Approval in the bottom-right corner of the mission details screen.
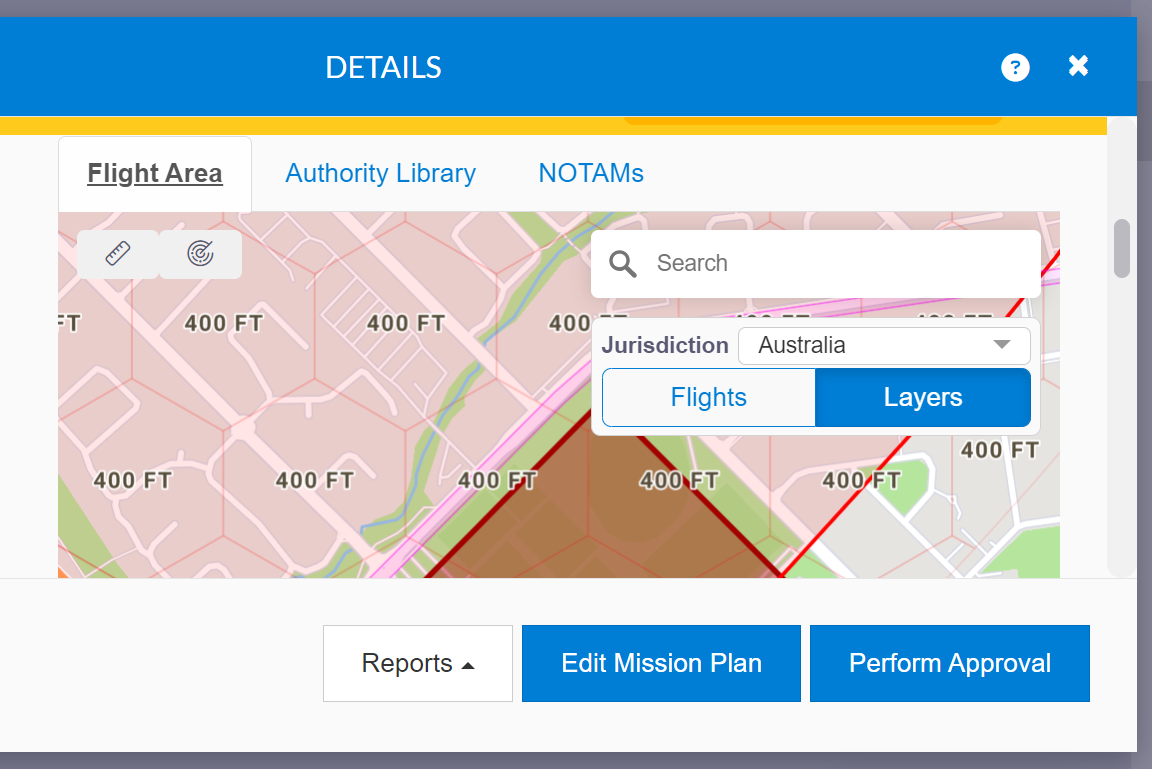
This brings up the approval screen. From here you can review the mission plan, including any completed forms (JSA etc) and check the location and airspace information.
Clicking on any link will display the details of that item.
The approval comms panel at the top of the screen allows for 2 way communication between the submitter and the approver.
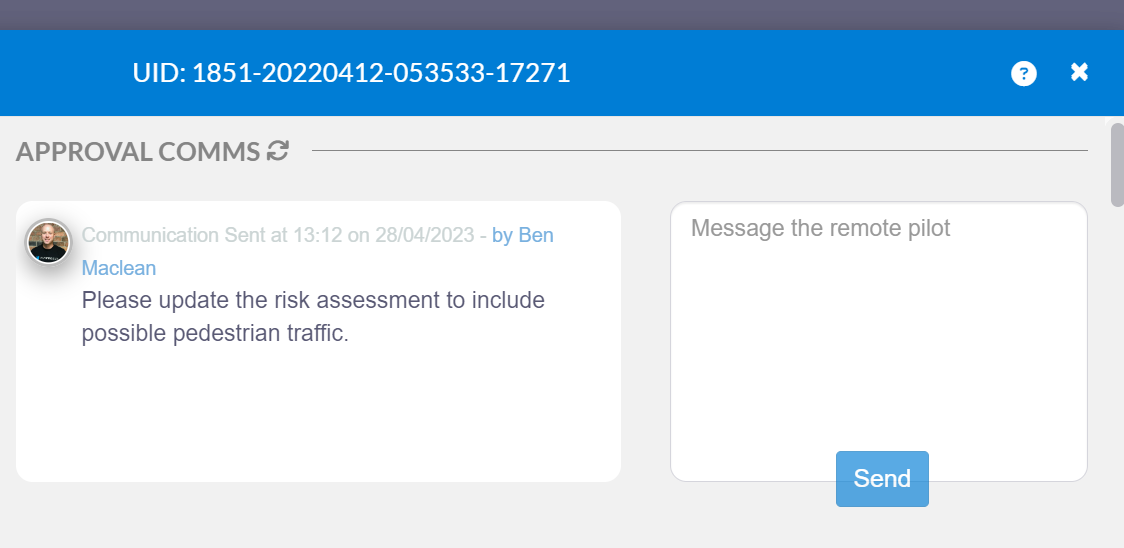
Each party will be notified when they receive a new message and can respond via the app. All approval comms are added to the mission record.
Approving via the Office App (NEW)
Approvers will receive a notification of the submitted mission/s, both in the notifications bar and via email. The mission can be access either from the dashboard mission list, or via the mission name in the notification list.
Once the mission is open, you will have the option to Perform Approval in the bottom-right corner of the mission details screen.
This brings up the 'Edit Mission Plan' screen. We have added a new section for approvals and the screen should auto-scroll down to the relevant section where you can perform the approval.
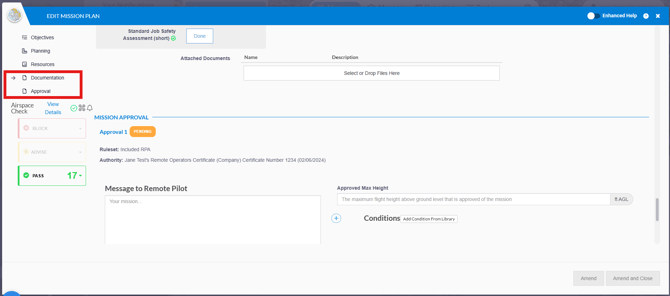
From here you can review the original mission plan by clicking on the relevant sections on the left panel or scrolling up/down to view the details. Direct amendments can be made to the plan if required.
New Layout:
We've introduced this new layout to help approvers streamline their approval flow. This allows approvers to review the original planned mission and make direct amendments if required.
The approval fields and actions remain the unchanged, they have simply been moved to a new section within the 'Edit Mission Plan' screen.
Users without any approval permissions will not have access to this section. The 'Perform Approval' button above will not be available to them.
If you would like to go back to using the legacy approval workflow, please email support@flyfreely.io to request this and our team will make this change for you.
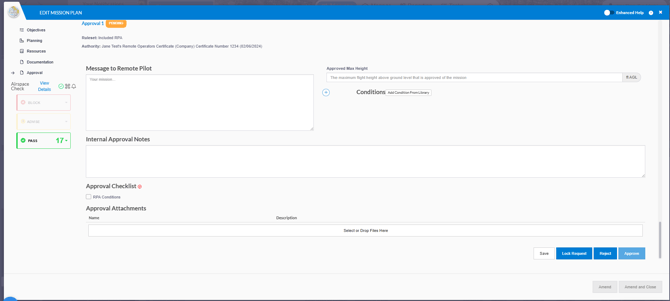
The approval communications panel is not available on this screen. To contact the pilot, use "Message to Remote Pilot".
Multiple Approvals
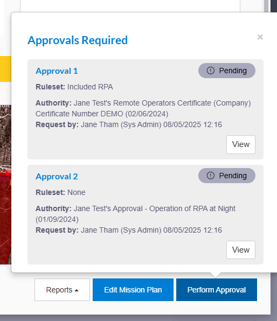
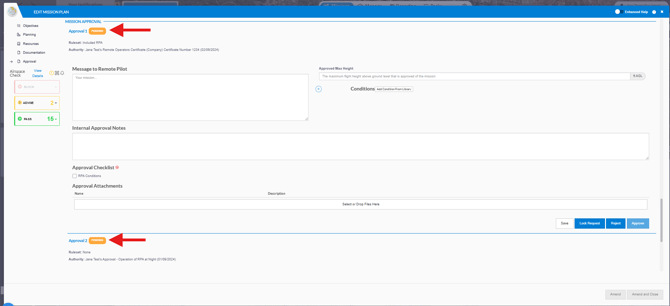
This applies to missions requiring approval from multiple authorities. You can approve each authority individually.
Legacy view: Click the 'View' button to perform the approval on the relevant authority.
New view: All approvals are listed sequentially in the approval section of the 'Edit Mission Plan' screen.
Approval Checklist
It is possible to set up an 'Approver checklist' to ensure that all relevant checks are being actioned. See How to Create an Approval Checklist for more information.
Approve / Reject / Lock Request
The approver has 3 main options:
- Approve the mission
- Reject the mission
- Lock the mission
Approve
This will send the mission to 'Ready to Fly' status. The mission will then become available for execution in the field app by the Remote Pilot in Command (RPIC) listed on the mission.
Reject
The mission will revert to 'draft' status, and is available for editing by the submitter. The mission can be resubmitted for approval at any time.
Lock
This option places a lock on the mission so it cannot be edited. The mission status remains 'Submitted' until the approver unlocks the mission to either approve or reject it.
Approval Conditions Library (✨Enterprise feature✨)
You may have set approval conditions depending on the type of operation. You can create as many approval conditions libraries to select from at the approval stage. This will help streamline the approval process.
To configure this, navigate to the org admin panel > Mission Configuration > Approval Conditions
- Click on the "+" icon
- Give the Library a name
- Click the "+" icon next to Add Condition
- Enter your condition
- Repeat steps 3 & 4 if you would like to add more conditions to this library
- Click 'Save and Close'. You have created a library
- To create more libraries, repeat steps 1 - 6
To select the approval conditions at the approval stage:
- Click on the 'Approval Details' tab
- Click on 'Add Condition From Library'
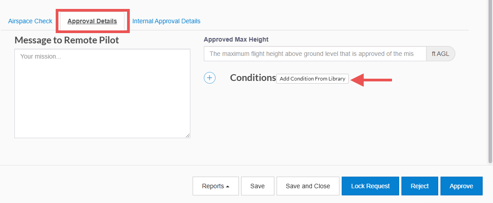
- Select the condition/s you'd like to add to the approval
- Click 'Add Selected'
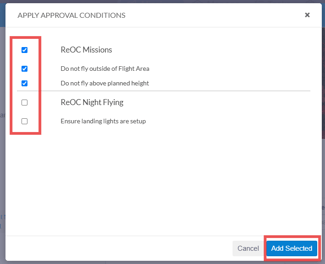
- You have now added your conditions, proceed with your approval process
Approving via the Field App (Teams & Enterprise Customers)
Customers on our Teams or Enterprise subscriptions also have the option of conducting mission approvals via the Field App.
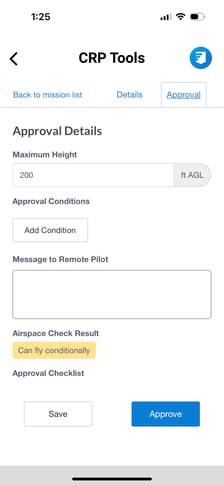
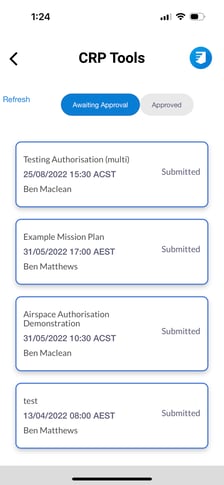
To access mission approvals, select 'CRP Tools' in the app menu.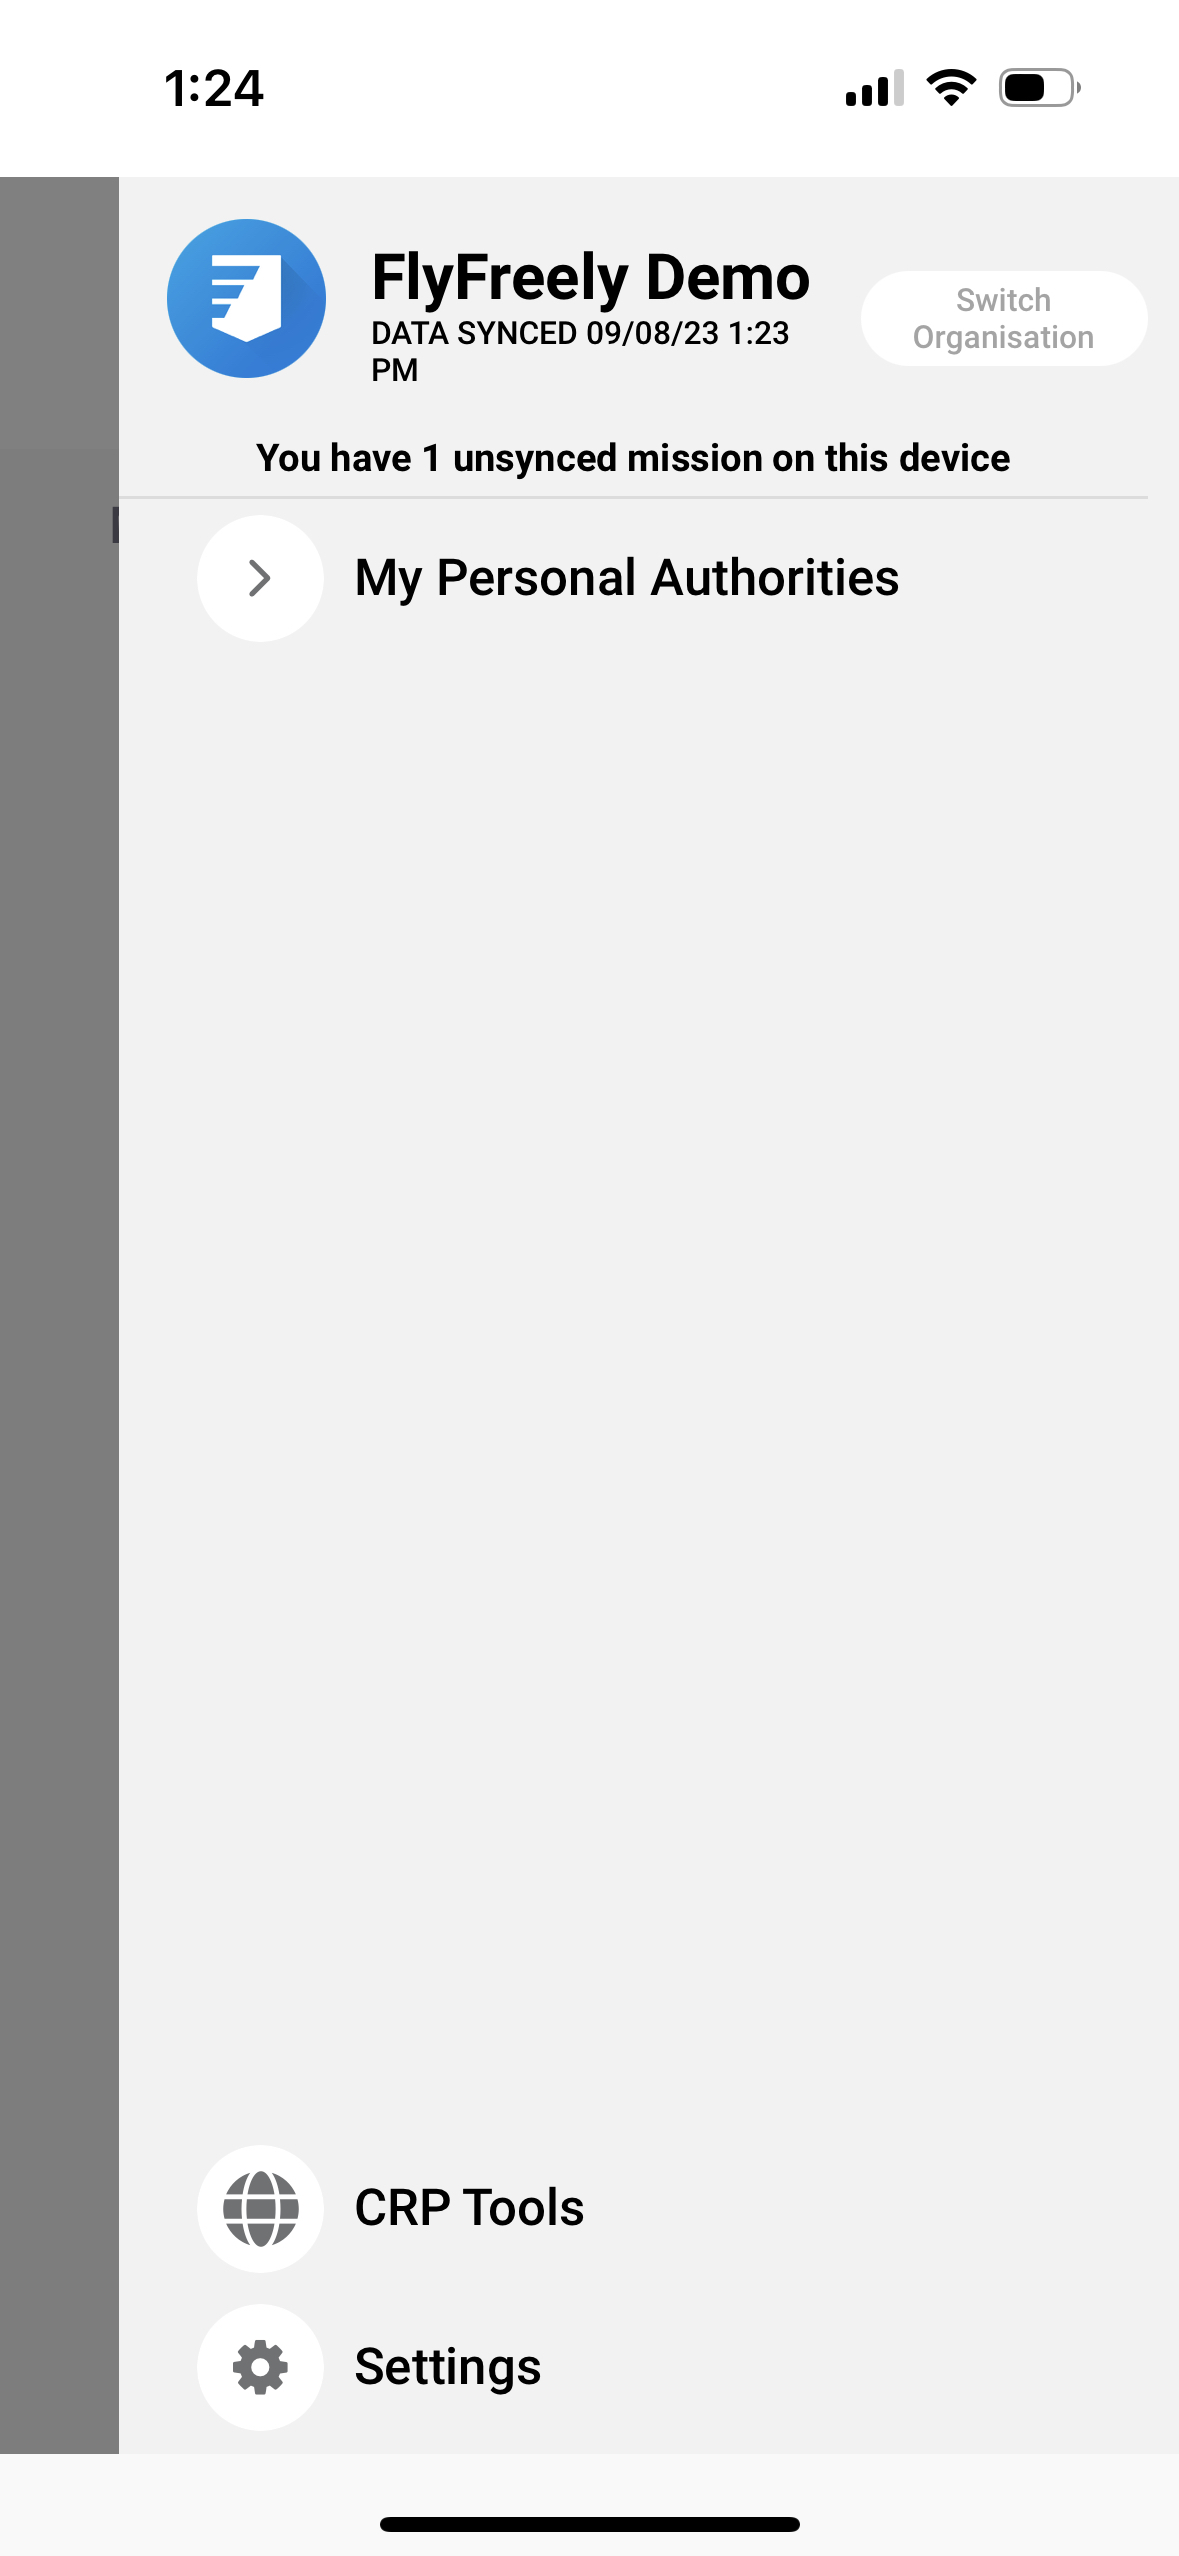 On this screen you will be able to view any missions currently awaiting approval, as well as previously approved missions depending on the active tab.
Tap on any mission to view it's details.
 |
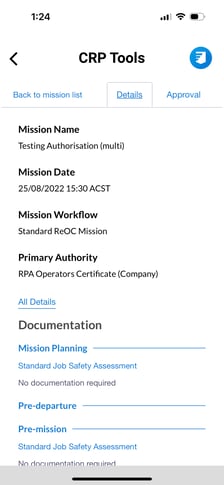 |
To approve the mission, tap on the 'Approve' tab. Enter any additional conditions / max height etc and tap 'approve'.