Running the Field App on Smart Devices
Sideloading the FlyFreely Field App onto your Android device (eg. DJI smart controllers) allows seamless log capture alongside your flight control app.
This article will cover the following items:
Installing the app (if using USB or SD Card)
Post Mission Actions (applies to new RPA only)
Flight Log Capture
The main advantage to running this version of the field app is that it allows for automatic collection and assignment of flight logs. This applies where the FlyFreely and flight control apps are being used on the same device.
Mission Sync (Recommended)
For operators running their mission workflow (field app) on the same device as their flight control app, FlyFreely will provide the most seamless flight logging integration.
Simply open the field app and either open a pre-planned mission or create a new mission. Once you've completed any relevant checklists and started the flight timer, the app will automatically detect and import flight logs as they're generated. Once you've finished your flying and completed the mission, any log files will be uploaded and assigned to the correct flight record automatically.
The in-app flow looks like this:
- Open mission (pre planned) or create and plan mission on field app
- Complete pre mission checks (as required)
- On the pre-flight configuration screen, choose the reconcile later battery option
- Complete pre flight checks (as required)
- Start the flight timer, switch to your flight control app and proceed with flight
- End the flight timer after landing. The log file generated by your RPA will be captured by FlyFreely at this point.
- Fly again or End all flying as required. For subsequent flights, follow the same process as above.
Background Sync
If you need to collect flight log/s without running your workflow in the field app, you can do so by opening the field app letting it run in the background.
As long as this device is used to run your flight control app (eg DJI Pilot), any flight logs generated will be collected automatically, and uploaded to your FlyFreely account.
An extra step is required post-mission, as these logs will not be associated with any specific mission in FlyFreely. You can assign them to the relevant mission and flight/s via the office app. See KB: Assigning your flight logs to missions and flights.
This is particularly useful for 2 person crews, where you might wish to run your flight control app on one device (and run the field app in flight logging mode in the background) and complete your field app checklists on a separate device.
From the smart controller:


Supported Devices
The APK file can be installed on the following Android devices:
- Pro and Enterprise DJI Smart Controllers (Note, the DJI RC does not support 3rd party apps, so the Field App will not work. The DJI RC Pro and other enterprise controllers do.)
- Most Android smart phones
- Android based tablets
Note: the support devices are hardware dependent and not software restricted. Older or budget level devices are generally not supported.
Download App via Device Web Browser
Device Restrictions
Some devices might not allow the installation of 3rd party apps by default. In these cases, please consult your device's instructions for entering 'developer' or 'admin' mode.
FlyFreely does not support flight log capturing for any Agras drones. This is because the file type is different and our system is unable to interpret them.
*Unsupported Platforms*
Please do NOT use third party platforms to install/download the FlyFreely Field App. We do not provide support for apps downloaded by third party platforms, such as 'uptodown'.
Official platforms we publish our field app to that you can download from are:
- iOS devices - App store
- Android devices - Google Playstore
- DJI Smart Controllers - APK file below
The below screenshots were taken using the DJI RC Pro. Other devices might look slightly different.
Two ways to download the app:
- Using the browser on your controller to Download the .APK file 🔗 on your device.
Open the browser on your device and search for " knowledge.flyfreely.io/ " this will take you to our knowledge article page.
Search for 'Android' and select 'Sideloading the Field App on Android devices'
Scroll down until you see the linked text 'Download the .APK file' and click it
Click 'Download'. Note the version may be different to when this screenshot was taken. Please refer to Field App Release Notes for the latest version and changes.
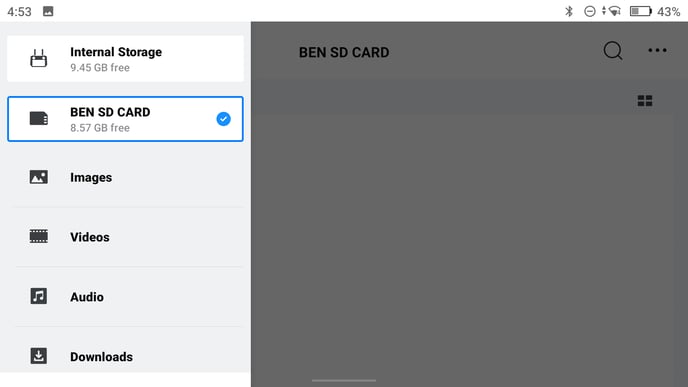
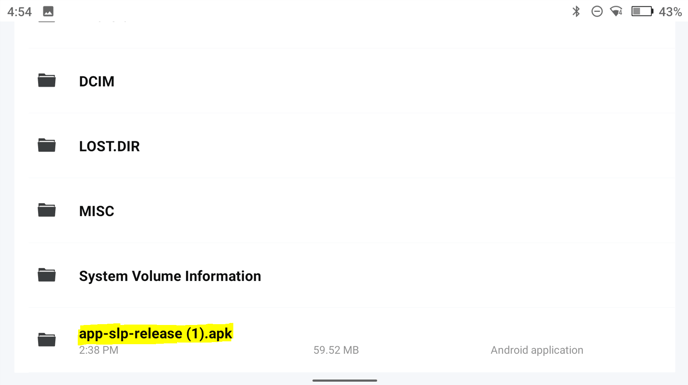
Once downloaded, go to your Files folder and scroll to click on the 'Download' folder. The apk file should be found here. Click here to continue the steps to install the app. - Download the .APK file to your PC and move it to your android device via USB connection or SD card (depending on the device).
Installation
On some systems, you may have to change the app installation settings in order to proceed. In this case, the message should have a 'settings' link which will take you to the 'install unknown apps' option in settings. Toggle this setting to ON to continue.
Tap the file to begin the installation. You may see a warning message in regards to installing apps from unknown sources. As shown below, simply tap 'CONTINUE' proceed.
Click 'INSTALL'
The installation is complete. To help differentiate the app versions, the sideloaded app has a grey icon, while the play store and app store versions are blue. It will also be called "FlyFreely Field App SL", for side loaded.
Video on how to install the app via SD Card
Running the App
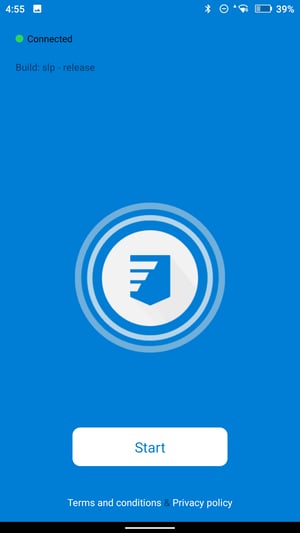
To help differentiate the app versions, the sideloaded app has a grey icon, while the play store version is blue. It will also be called "FlyFreely Field App SL", for side loaded.
The below screenshot is taken from an Android tablet. Other devices might vary slightly.

This version of the app is functionally identical to the one found on the play store, with the addition of the automated flight log capture.
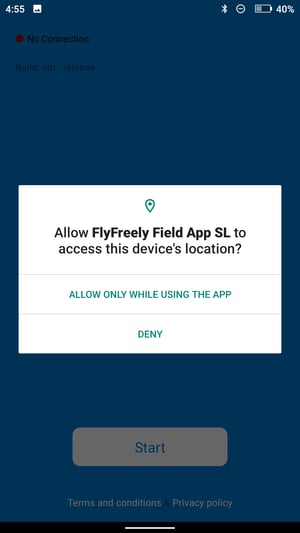
You might see a dialog box pop up the first time you open the app, as shown on the left.
You'll need to allow the app to access location services as it uses GPS location to inform the airspace checker, map view and other basic functions.


The FlyFreely app will generally display in portrait orientation, including on most devices with a landscape display.
Experiencing delays or lag using the Field App on your controller
If you are experiencing delays when moving between stages of a workflow
eg Pre-Mission > Pre-Flight > etc
It could be caused by the number of flight logs stored on your device. Numerous log files on the device causes the app to slow down. Please check your log file and remove old records. See here for more information.
Post Mission Actions
This step must be actioned once for each RPA in your organisation.
You will need to establish a link between your incoming flight logs and your RPAS. After the initial link is established, the platform will auto match the RPA.
For more information and instructions, see Setting up 'Auto Matched RPA' from Captured Log Files

